Review of Implementing Airflow
“By adopting Airflow, we transitioned from a traditional Python-based session approach to a DAG-based workflow to efficiently manage our internal data notification system. Using Docker Compose, we set up Airflow in both local and VM environments and automated various data pipelines, including Slack notifications. This implementation reduced maintenance overhead, improved stability, and established a scalable data processing environment.”
Table of Contents
- Background of Adoption
- Review of Implementation
- 2.1. Project Plan
- 2.2. Local Environment Setup
- 2.3. VM Instance Environment Setup
- 2.4. Creating a DAG
- Future Challenges
1. Background of Adoption
As a Data Engineer at IoTrust, I mainly focus on Analytics Engineering tasks such as:
- (1) Designing and developing the data warehouse & data mart
- (2) BI dashboards
- (3) Ad-hoc data notification bot development
- (4) Event taxonomy design and documentation management
- (5) Automation of (Finance/HR/CX) tasks
However, over time, problems began to arise with my role in “(3) Ad-hoc data notification bot development”. As I worked to enable colleagues to quickly check key metrics on Slack in real-time, the number of Python files gradually increased, and managing them became more resource-intensive.
Specifically, I was managing all Slack notifications by running individual Python files directly in separate sessions using tmux. tmux is an open-source terminal multiplexer that allows managing multiple sessions independently within a single terminal. (Wikipedia)
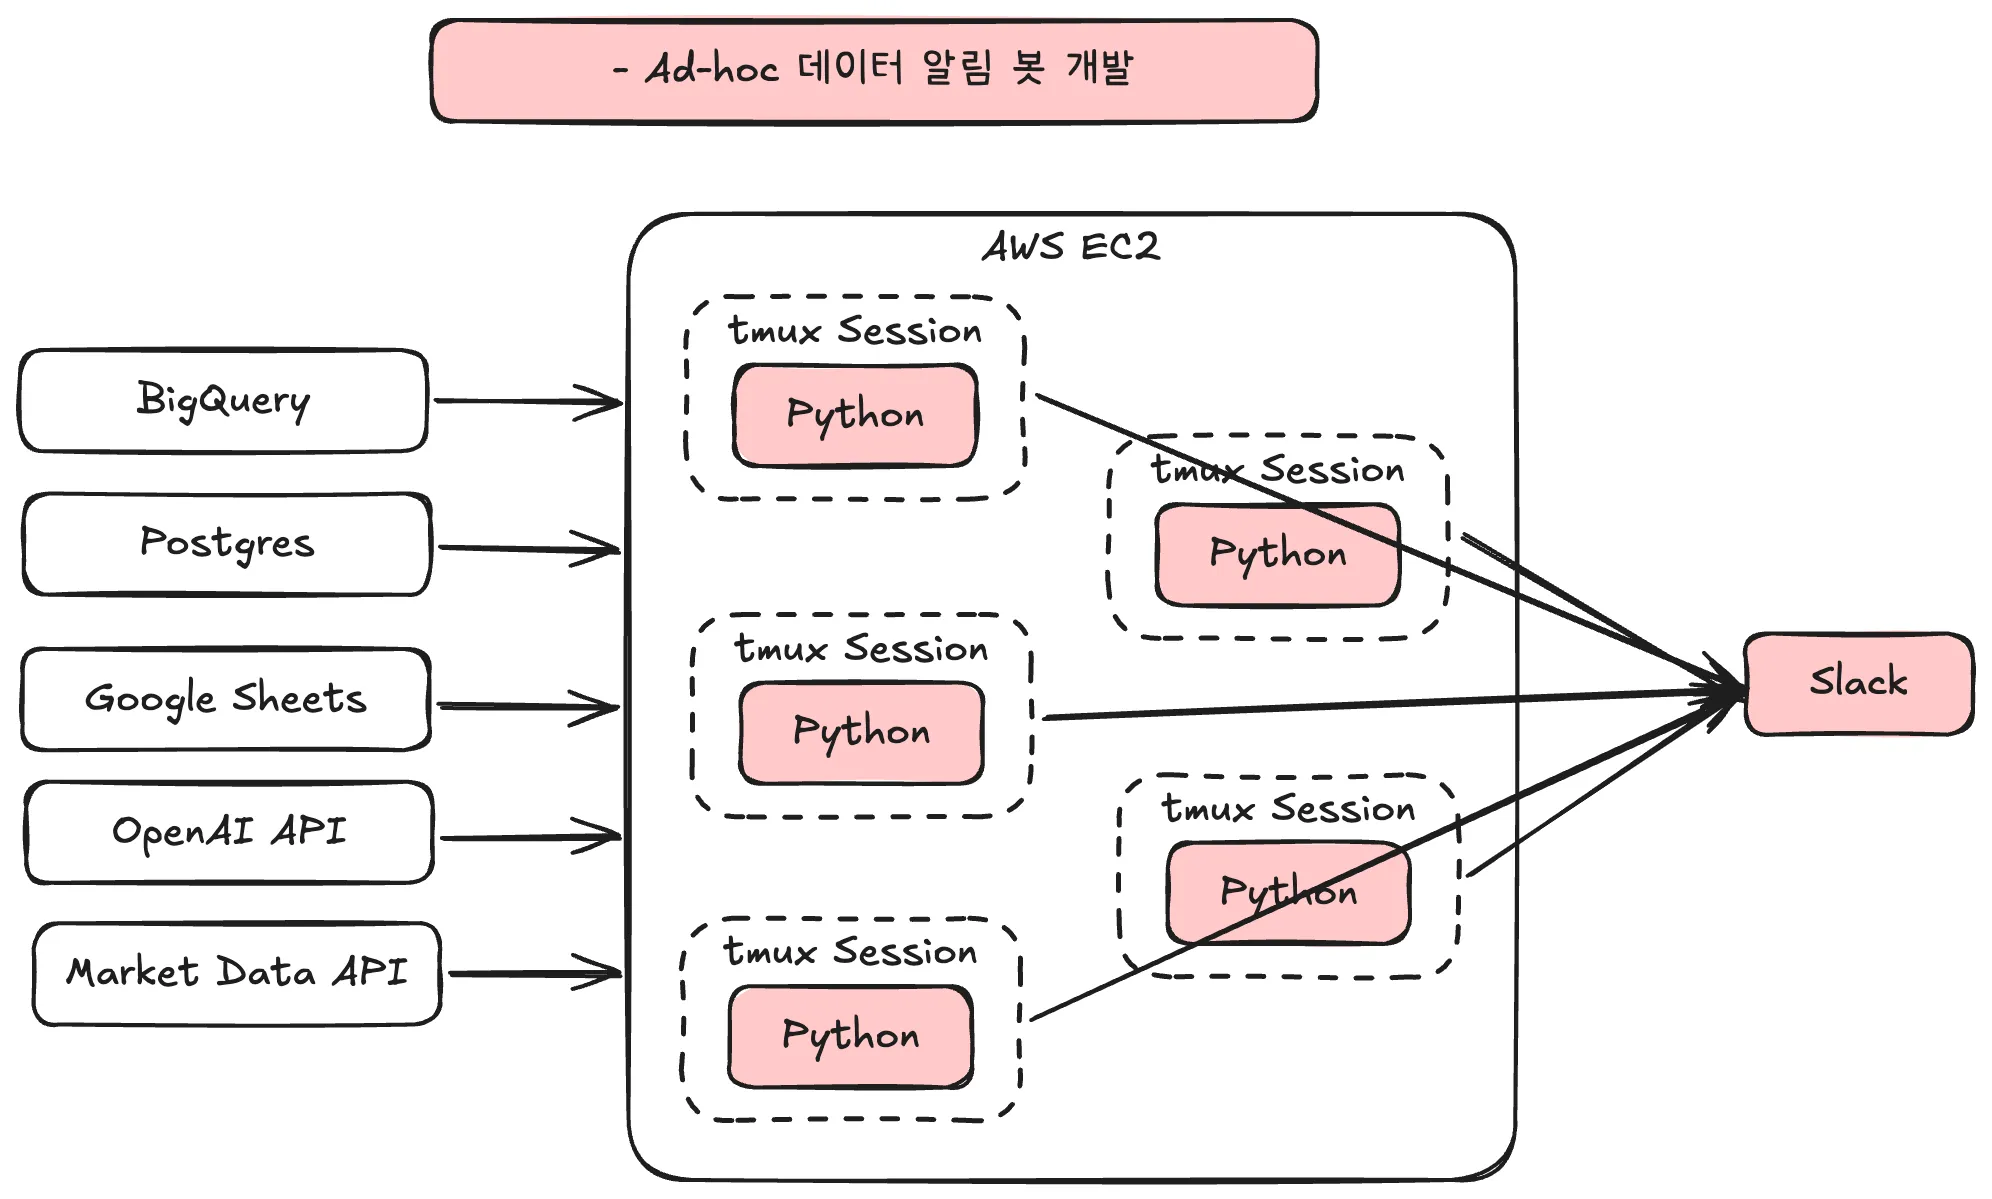
As the number of Python files grew and the complexity increased, the following issues emerged:
(1) Increased Maintenance Burden
When a Python script encountered an error, execution stopped immediately, and colleagues would not receive notifications until debugging was complete. There was no retry mechanism in place.
Additionally, debugging took a significant amount of time. Since dependent pipeline steps were all managed within a single main() function, identifying the exact failure point was difficult, leading to considerable time wasted. As a result, it became harder to stay focused on more important tasks.
(2) Lack of Stability in Session-Based Management
Server reboots or network issues could disrupt tasks, and there were instances where sessions were unexpectedly terminated, requiring recovery efforts.
Moreover, since all sessions shared the same environment, dependency conflicts could occur even when using Python Venv.
Due to these reasons, the need for Airflow as a workflow management tool grew stronger.
- Tasks can be automatically recovered simply by restarting containers.
- Each task operates in an isolated environment.
- The system is scalable for future workflow expansions.
- The web UI makes task monitoring and management easier.
Initially, I had considered introducing Airflow when starting “Ad-hoc data notification bot development”. However, since the workflow was small at the time, I followed the YAGNI principle and decided against premature adoption.
YAGNI stands for “You Aren’t Gonna Need It,” an Agile software development principle that advises against adding unnecessary complexity. At that time, I believed in setting up a workflow that only met current needs, so I opted for a session-based approach.
However, as the workflow scaled, inefficiencies and resource waste in session management became more evident. This led me to finally decide on adopting Airflow.
2. Review of Implementation
2.1. Project Plan
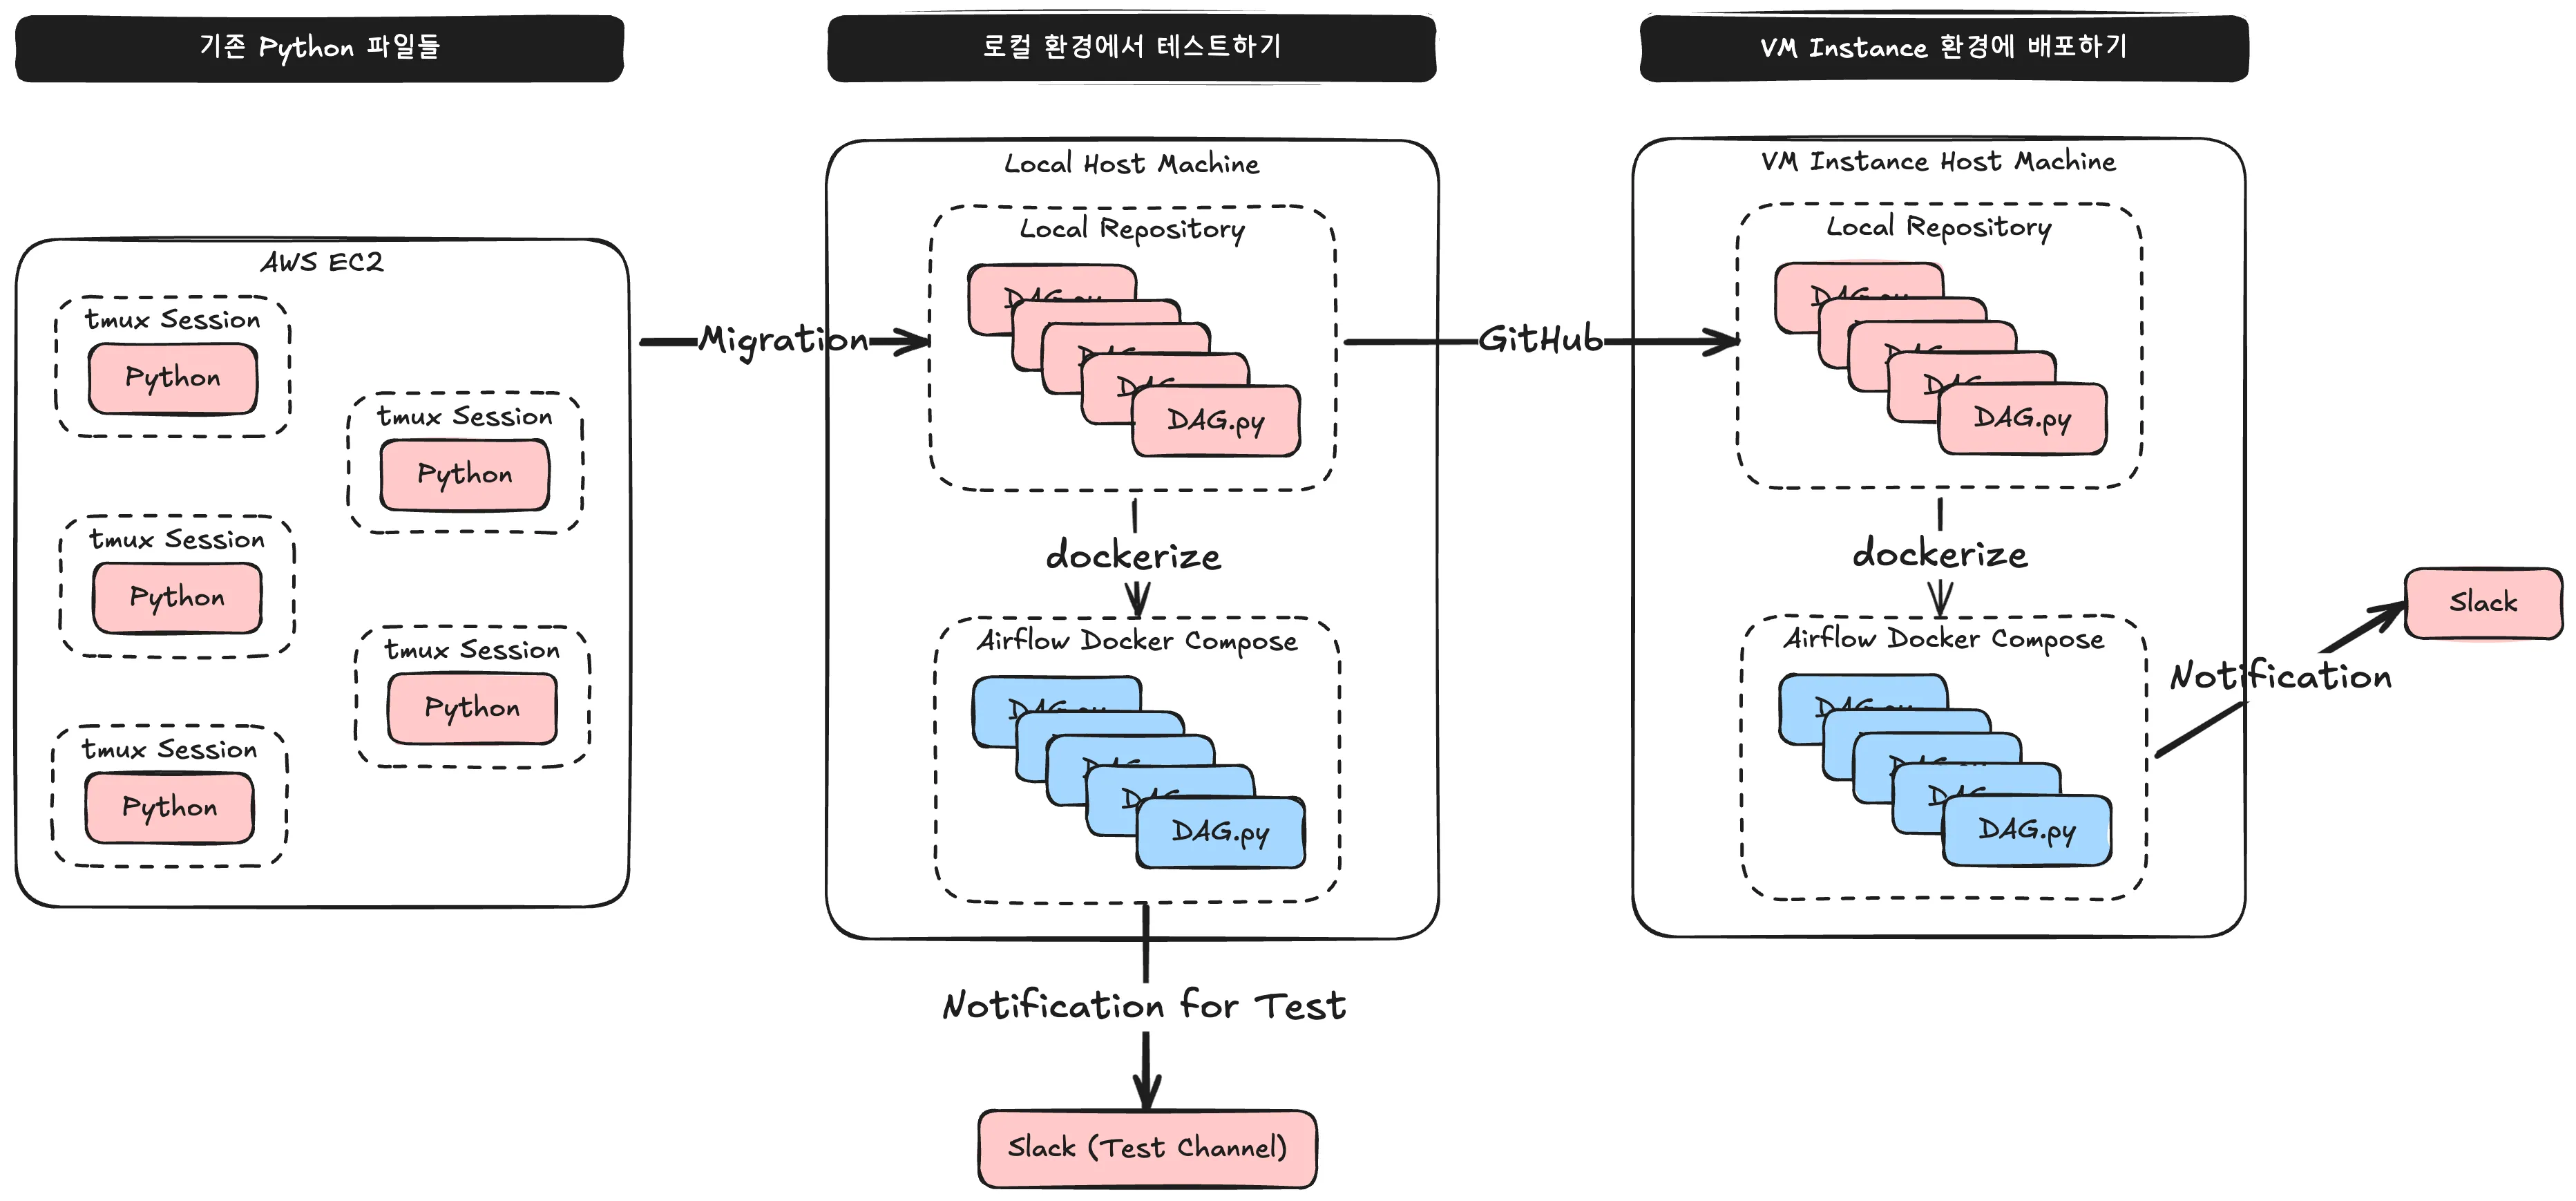
First, I established a plan as shown above.
(1) Modify existing Python scripts to fit the DAG format.
(2) Build the Airflow project in a local environment using Docker Compose and verify that notifications are correctly sent to a Slack test channel.
(3) Deploy the Airflow project on a VM instance using Docker Compose to finalize the notification system.
2.2. Local Environment Setup
(0) Docker must be installed.
- I installed the Docker Desktop app. You can refer to this guide for installation instructions.
(1) Created a Python virtual environment.
python -m venv venv
source venv/bin/activate
(2) Loaded the Airflow image by running the following command in a directory named airflow (this will generate a docker-compose.yaml file).
curl -LfO 'https://airflow.apache.org/docs/apache-airflow/2.9.1/docker-compose.yaml'
(3) Created dags, logs, plugins directories and an .env file with the AIRFLOW_UID environment variable.
mkdir -p ./dags ./logs ./plugins
echo -e "AIRFLOW_UID=$(id -u)" > .env
(4) Created a Dockerfile with the following content.
# First-time build can take upto 10 mins.

FROM apache/airflow:2.9.1

ENV AIRFLOW_HOME=/opt/airflow

USER root
RUN apt-get update -qq && apt-get install vim -qqq
# git gcc g++ -qqq

COPY requirements.txt .
RUN pip install --no-cache-dir -r requirements.txt

# Ref: https://airflow.apache.org/docs/docker-stack/recipes.html

SHELL ["/bin/bash", "-o", "pipefail", "-e", "-u", "-x", "-c"]

ARG CLOUD_SDK_VERSION=322.0.0
ENV GCLOUD_HOME=/home/google-cloud-sdk

ENV PATH="${GCLOUD_HOME}/bin/:${PATH}"

RUN DOWNLOAD_URL="https://dl.google.com/dl/cloudsdk/channels/rapid/downloads/google-cloud-sdk-${CLOUD_SDK_VERSION}-linux-x86_64.tar.gz" \
    && TMP_DIR="$(mktemp -d)" \
    && curl -fL "${DOWNLOAD_URL}" --output "${TMP_DIR}/google-cloud-sdk.tar.gz" \
    && mkdir -p "${GCLOUD_HOME}" \
    && tar xzf "${TMP_DIR}/google-cloud-sdk.tar.gz" -C "${GCLOUD_HOME}" --strip-components=1 \
    && "${GCLOUD_HOME}/install.sh" \
       --bash-completion=false \
       --path-update=false \
       --usage-reporting=false \
       --quiet \
    && rm -rf "${TMP_DIR}" \
    && gcloud --version

WORKDIR $AIRFLOW_HOME

COPY scripts scripts
RUN chmod +x scripts

USER $AIRFLOW_UID
(5) Created a requirements.txt file.
apache-airflow-providers-google
pyarrow
(6) Edited docker-compose.yaml to include environment variables for Google Cloud and Slack authentication.
/keys: Used to store the Google Cloud service account JSON key file..env: Stores Airflow Admin login credentials and Slack API token.
x-airflow-common:
  ...
  environment:
    ...
    AIRFLOW__CORE__LOAD_EXAMPLES: 'false' # Prevents sample DAGs from being created.
    ...
    GOOGLE_APPLICATION_CREDENTIALS: /keys/airflow_credentials.json # Path to Google Cloud service account JSON key file.
    AIRFLOW_CONN_GOOGLE_CLOUD_DEFAULT: 'google-cloud-platform://?extra__google_cloud_platform__key_path=/keys/airflow_credentials.json' # Same as above.
    GCP_PROJECT_ID: 'gcp_project_id' # Google Cloud project ID.
    AIRFLOW_CONN_SLACK_DEFAULT: 'slack://:${SLACK_TOKEN}@' # Slack API token managed in the .env file.
    ...
  volumes:
    ...
    - ./keys:/keys:ro # Maps the `/keys` directory containing the Google Cloud service account JSON key file to Docker.
...
services:
  ...
  airflow-init:
    ...
    environment:
      ...
      _AIRFLOW_WWW_USER_USERNAME: ${_AIRFLOW_WWW_USER_USERNAME} # Airflow Webserver login credentials stored in .env.
      _AIRFLOW_WWW_USER_PASSWORD: ${_AIRFLOW_WWW_USER_PASSWORD} # Airflow Webserver login credentials stored in .env.
      ...
(7) Building Docker Compose and Initializing Airflow
docker-compose build
docker-compose up airflow-init
(8) Running Docker Compose
docker-compose up -d
docker-compose ps
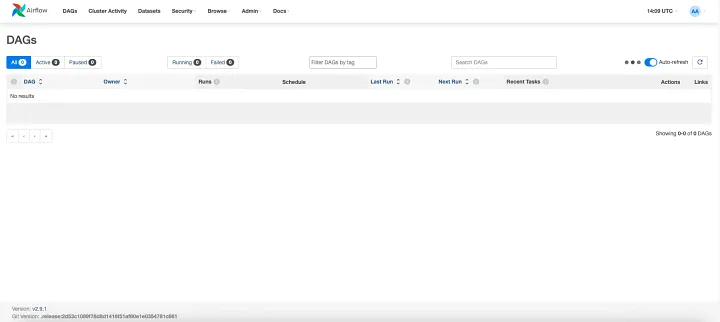
(9) Accessing the Airflow Webserver
1) Open http://0.0.0.0:8080 in a browser.
2) Log in using the credentials set in the `docker-compose.yaml` file:
  - _AIRFLOW_WWW_USER_USERNAME
  - _AIRFLOW_WWW_USER_PASSWORD
(10) Initializing Git and Linking to GitHub
git init
git remote add origin https://github.com/.../airflow.git
git branch -m main
git add .
git commit -m "created airflow project"
git push -u origin main
2.3. VM Instance Environment Setup
(1) Creating Firewall Rules (To allow internal access to the Airflow Webserver running on the VM Instance, I configured firewall rules.)
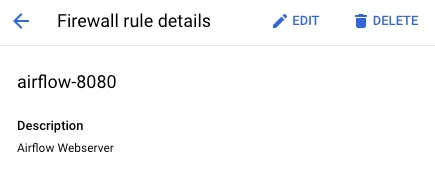
- Direction: Ingress
- Target Tags: airflow (You can name this as needed.)
- Source Filter > IP Range: Internal company IP address range.
- Protocol and Port: tcp-8080 (The webserver communicates with the host machine via port 8080, which can be modified in
docker-compose.yaml.)
(2) Creating the airflow VM Instance
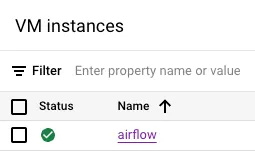
- Machine Type: E2 series with at least 2 vCPUs and 8GB of memory (If using 4GB, the server may struggle with network traffic.)
- OS & Storage: Debian OS, 10GB storage.
- Firewall: Enabled HTTP & HTTPS traffic, and assigned the
airflowtag created in the firewall settings.
(3) Installing Docker and Python Virtual Environment (Following the same setup as in the local environment)
- Refer to steps (0) and (1) from Section 2.2 for installing Docker and setting up a Python virtual environment.
(4) Cloning the Repository and Configuring Environment Files (Created the airflow directory and cloned the remote repository. Then, manually added /keys and .env files.)
git clone https://github.com/.../airflow.git
(5) Building and Running Airflow on the VM (Following the same procedure as the local environment)
- Refer to steps (7) and (8) from Section 2.2 to build and execute Docker Compose.
(6) Accessing the Airflow Webserver on the VM
1) Open http://{VM Instance External IP}:8080 in a browser.
2) Log in using the credentials set in the docker-compose.yaml file:
  - _AIRFLOW_WWW_USER_USERNAME
  - _AIRFLOW_WWW_USER_PASSWORD
2.4. Creating a DAG
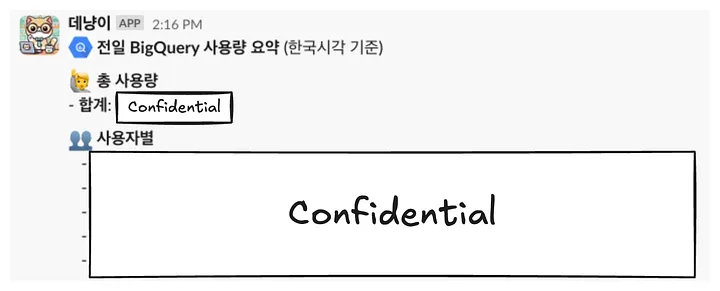
The simplest DAG I created is the Daily BigQuery Usage Notification. This is primarily a self-notification system to help me manage Google Cloud resources efficiently. Below, I will break down the DAG.py code step by step.
(1) Importing Required Libraries and Operators
# ========================================================================
# Importing Required Libraries and Environment Variables
# ========================================================================

from airflow import DAG
from airflow.operators.python import PythonOperator
from airflow.providers.slack.operators.slack import SlackAPIPostOperator
from airflow.models import Variable

from google.cloud import bigquery

from pendulum import timezone
from datetime import datetime, timedelta
- Instead of using BigQuery-specific Airflow operators, I opted for
google.cloud.bigqueryandPythonOperator. Since this DAG primarily involves SELECT queries that return large datasets, using XCom to pass data between tasks would be inefficient.
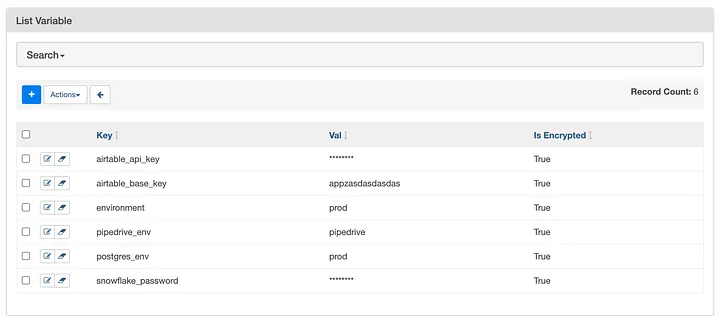
(2) Defining Key Variables and Clients
# ========================================================================
# Defining Clients and Key Variables
# ========================================================================

bigquery_client = bigquery.Client()
kst = timezone('Asia/Seoul')

SLACK_CHANNEL_TEST = Variable.get('slack-channel-test')
SLACK_CHANNEL = Variable.get(
    'slack-channel-prod',
    default_var=SLACK_CHANNEL_TEST,
)
- kst: Since Airflow uses UTC as its default timezone, I explicitly set it to Korean Standard Time using
pendulum.timezone. - Slack Channel: The final step in this DAG sends a notification to a Slack channel. To prevent unnecessary alerts, I first test the DAG using a dedicated Slack test channel before deploying it to the production channel.
(3) Defining DAG Default Arguments
# ========================================================================
# Defining DAG Default Arguments
# ========================================================================

default_args = {
    'owner': 'Joshua Kim',
    'start_date': datetime(2025, 1, 1, tzinfo=kst),
    'depends_on_past': False,
    ...
}
(4) Writing Dynamic Query Functions
# ========================================================================
# Query Definitions
# ========================================================================

...

# Query Usage (by user)
def query_usage_by_user(date):
    return f"""
        SELECT
            user_email AS user,
            SUM(total_bytes_billed) / POW(2, 30) AS gibibyte
        FROM
            `{project_id}.{region}.INFORMATION_SCHEMA.JOBS`
        WHERE
            DATE(TIMESTAMP(creation_time), "Asia/Seoul") = '{date}'
            AND job_type = 'QUERY'
        GROUP BY
            1
        ORDER BY
            2 DESC
    """

...
(5) Writing Core Functions for Task Execution
# ========================================================================
# Function Definitions
# ========================================================================

# Fetch BigQuery Data
def fetch_bigquery_data(**kwargs):

    # Yesterday
    today_kst = kwargs['execution_date'].in_timezone(kst)
    yesterday_kst = today_kst.subtract(days=1).to_date_string()

    ...

    # Query Usage by user Yesterday
    usage_by_user_df = bigquery_client.query(query_usage_by_user(yesterday_kst)).to_dataframe()
    usage_by_user_dict = usage_by_user_df.set_index('user')['gibibyte'].to_dict()

    # Push Data to XCom
    ...
    kwargs['ti'].xcom_push(key='usage_by_user_dict', value=usage_by_user_dict)
    ...

# Write a Slack Message
def write_slack_message(**kwargs):

    # Read BigQuery Data
    ...
    usage_by_user_dict = kwargs['ti'].xcom_pull(task_ids='fetch_bigquery_data', key='usage_by_user_dict')

    # Create a Message
    message = f":bigquery: *Daily BigQuery Usage Summary* (Korean Timezone)\n"
    ...
    message += f"*:busts_in_silhouette: By User*\n"
    ...
    for user, usage in usage_by_user_dict.items():
        message += f"   - *{user}*: `{float(usage):,.2f}`GiB\n"
    ...

    return message
(6) Defining the DAG
# ========================================================================
# DAG Definition
# ========================================================================

with DAG(
    'bigquery_usage_alert',
    default_args=default_args,
    description='BigQuery Usage Notification',
    schedule_interval='5 0 * * *', # Runs daily at 12:05 AM KST
    catchup=False,
) as dag:

    # Fetch BigQuery Data
    task_fetch_bigquery_data = PythonOperator(
        task_id='fetch_bigquery_data',
        python_callable=fetch_bigquery_data,
    )

    # Write a Slack Message
    task_write_slack_message = PythonOperator(
        task_id='write_slack_message',
        python_callable=write_slack_message,
    )

    # Send a Slack Message
    task_send_slack_message = SlackAPIPostOperator(
        task_id='send_slack_message',
        text='',
        slack_conn_id='slack_default',
        channel=SLACK_CHANNEL,
    )

    # Data Lineage
    task_fetch_bigquery_data >> task_write_slack_message >> task_send_slack_message
- This DAG follows a straightforward workflow:

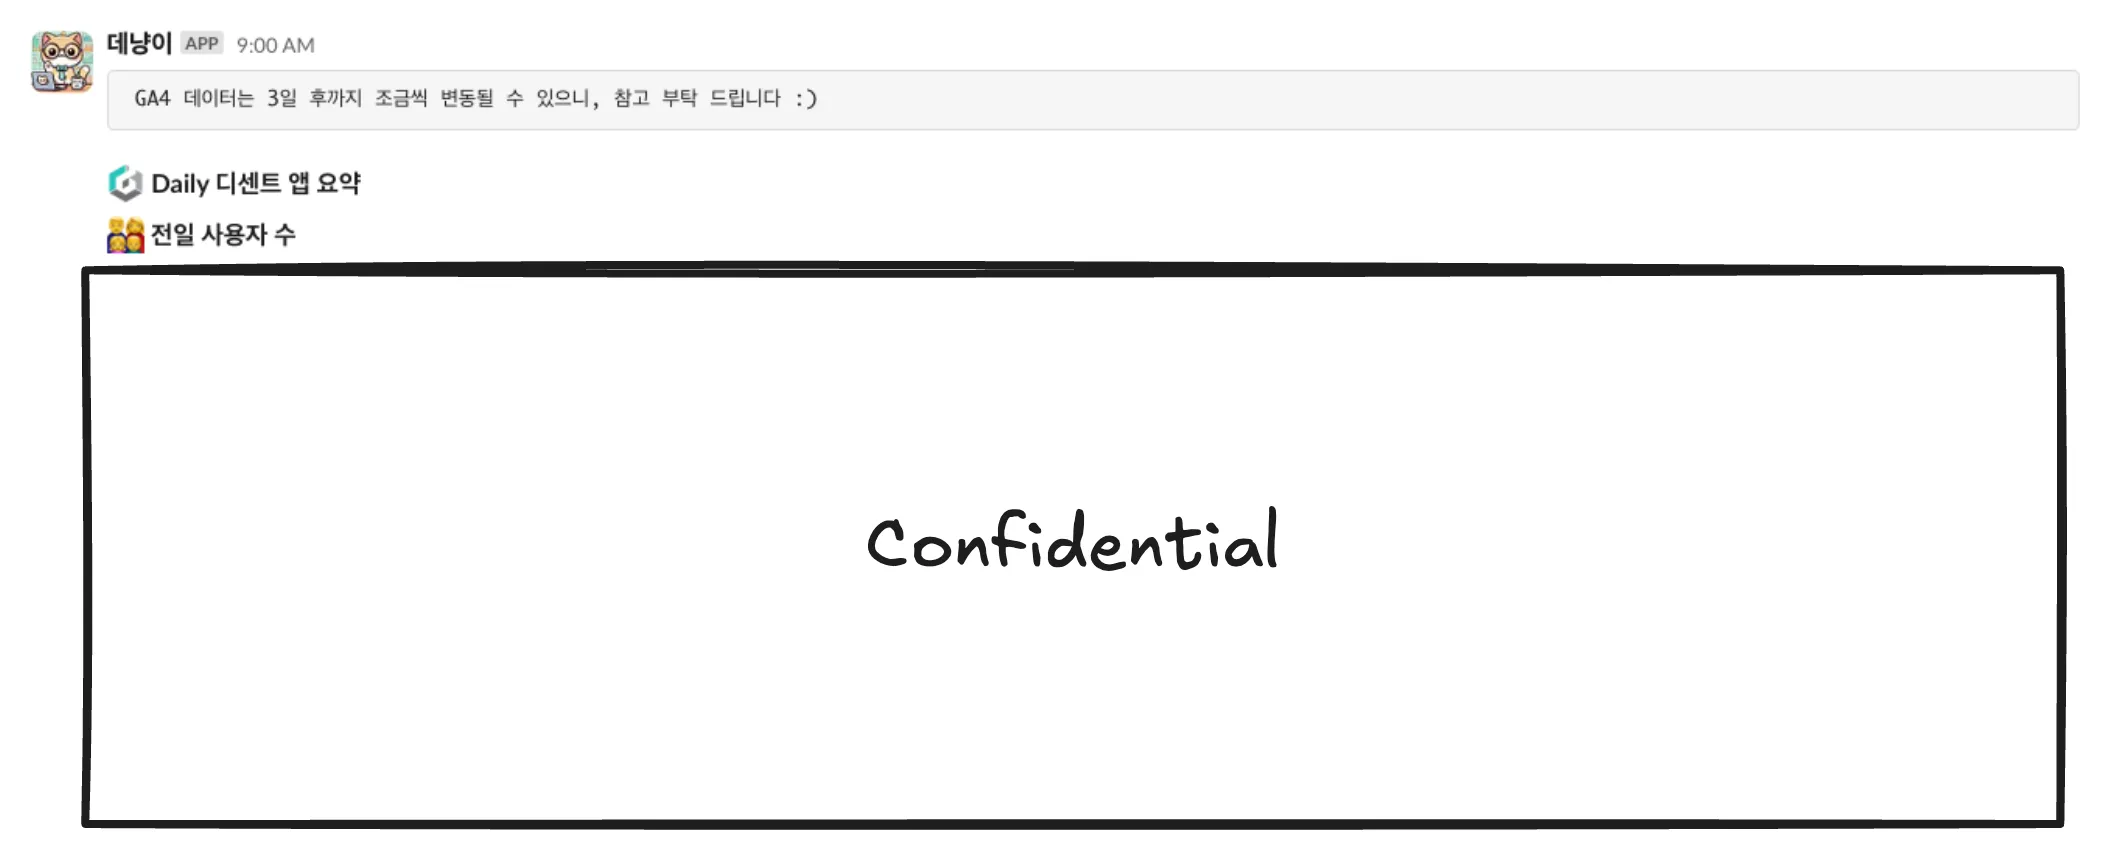
- And the Slack notification looks like this:
3. Future Challenges
Airflow presents a steep learning curve, especially for those unfamiliar with Linux or Docker environments. However, its flexibility makes it an excellent orchestration tool for data analysts, analytics engineers, and backend developers.
Following the successful implementation of Airflow in our company, I am now considering additional enhancements:
- Designing external data collection pipelines and sending refined data to stakeholders via email or Slack.
- Managing dbt table dependencies by setting up separate batch executions using Airflow DAGs.
- Exploring other optimization opportunities.
By reducing maintenance overhead and improving workflow stability through Airflow, I aim to maximize my work efficiency and focus more on high-impact tasks that enable my colleagues to better utilize data. Ultimately, this aligns with both my learning goals and my company’s growth objectives.
Published by Joshua Kim